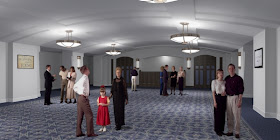
In the last chapter of this case study I will tell you how we did the ceiling. As we always do, we divide our model into groups: floor, walls and ceiling. In this way makes it easier to work with each part individually. In this figure you can see the different groups.
Once the walls were drawn and grouped to prevent bonding geometry with the ceiling we started modeling. The design presented no great difficulty except for the beams that interrupted the continuity of the vault. The first step was to create the arc for the vaulted ceiling. Since we needed only one face we used Vector Extrude Edges plugin by TGI. Using this tool is not necessary to have a face to extrude along an axis. With only defining the edge and a vector you can get a face. The vector in this case was the length of space to cover. The plugin can generate automatically a group.
Next, using the Offset tool, we made a copy of the initial arc to generate the transverse faces of the beams. We draw these faces and with Push / Pull tool we completed the volume along the vault.
In a perpendicular plane we draw the sections of the transverse beams and with the Follow Me tool we created the beams along the arc.
Orbiting around to have a bottom view of the ceiling, we use Intersect with Selection to complete the missing lines of intersections and then we smoothed with Ctrl + Erase the intersection lines between the central beams. We grouped all the elements.
We unhidden all groups and this is the final result. Merry Christmas for all of you and a happy 2012!


