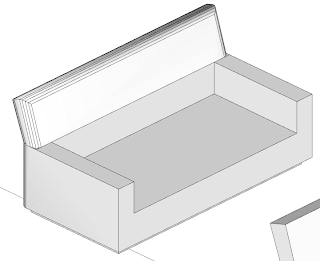
Completing a couch and put textures on round edges can be a
matter of just a few minutes with two essential plugins for interior designers.
The first, called RoundCorner by Fredo performs the rounding
of the edges and corners along a 2D profile. The plugin offers three modes:
Round Corners, Sharp Corners and Bevel. Also supports round corner concave
corners and non-orthogonal edge faces. Corners can have 2, 3, or more edges.
This plugin gives users a quick way to make operations that would take much
more time with Follow Me native tool.
RoundCorner does not work inside groups or components. It
includes an interactive selector which
allows selecting edges by picking them individually or by
group, or also by picking faces and vertices. Edges must have exactly 2 faces.
For use:
1. Select the edges you want to round. If you make a mistake
in selecting the edge click again. You can also choose a face to select edges.
2. Enter parameters in the menu bar. Enter an offset
distance and the number of segments for your new edge. Once having entered the
parameters a green check mark will show to execute, click on the screen. You
can also use Tab on your keyboard to bring up the Parameters dialog box and
then click OK
Note: The Round mode creates much more faces than the Sharp
option so be cautious while selecting this option.
While you get to know how to use the plugin my best advice
is to select edges by faces or one by one to control better your final result.
Also separate elements into groups or components to avoid sticking edges and to
simplify the process of applying materials. In the image below the cushions are
components.
Applying materials in Sketchup is pretty straightforward on
simple faces or when you have solid colors. However, in cases such as a
patterned fabric applied on curved faces matching the pattern can be very time
consuming using the native Projected Texture option of Sketchup.
ThruPaint is another plugin offered by Fredo that resides
within a suite of tools. Either RoundCorner or ThuPaint are available for free
on the SketchUcation forums. I encourage users to make a donation to Fredo’s
PayPal account.
The plugin offers three texturing options but not UV mapping.

• Natural UV ensures the continuity of the texture without
distortion. UV propagates from the original face painted by their common edges.
It is recommended for flat and smooth surfaces.

• Projected UV has
various choice of projection plane: Given initial plan, view camera, custom
faces, and local axes of the model.

• QuadMesh, requires
that you paint the faces arranged as pseudo-quads in a mesh fairly regular.
Useful for arches and spheres.
• You can also transfer UV mode (the paintbrush icon
colored), where you can substitute a texture with another, without changing the
UV.
For each texturing mode, you must select the axis U and V
direction flying over the edges of the first surface to be painted. In this
example I chose the Natural UV option with a single face selection. I have
found that this selection mode let you control easily how to apply the
material. The selection mode allows you to chose the face to be painted, which
gives you great control over how you want to texture your mesh. You can even
dictate to paint only front faces, back faces or both. This mixed with the
surface selection modes really speeds up the painting process.
For the sofa arm I started with the top horizontal face and
then I dragged the mouse toward the exterior and interior sides to keep the
same UV directions and allow the continuity of the fabric.
For the front of the sofa I selected the U and V direction
and then I continue dragging to the rounded faces.
After applying textures you can edit textured faces with the
following transformations: translation,
rotation, scale (uniform and non-uniform), mirroring, tiling
and return home.
For the transformation of texture, you can use the arrows (you
can hold down to progressively see
transformation), the VCB, where you can enter an exact value
or you can use the visual editor (click when you see the cross Red / Green).


